Creating a Template
Why is this necessary?
It’s simple — to speed up the process and avoid repeating the same action over and over again. Of course, at the end of this page, you’ll find a link to an archive containing a ready-to-use template for Adobe Illustrator, but it’s still important to understand the basics.
Where do we start?
We’ll follow the images. So, let’s create a new file by setting the parameters shown in the picture “D-1.1”.
Note that we select “Centimeters” in the units dropdown, since measurements and other values are written in centimeters — this way, it will be easier for us to transfer the numbers.
Click “Create” and move on to the workspace.
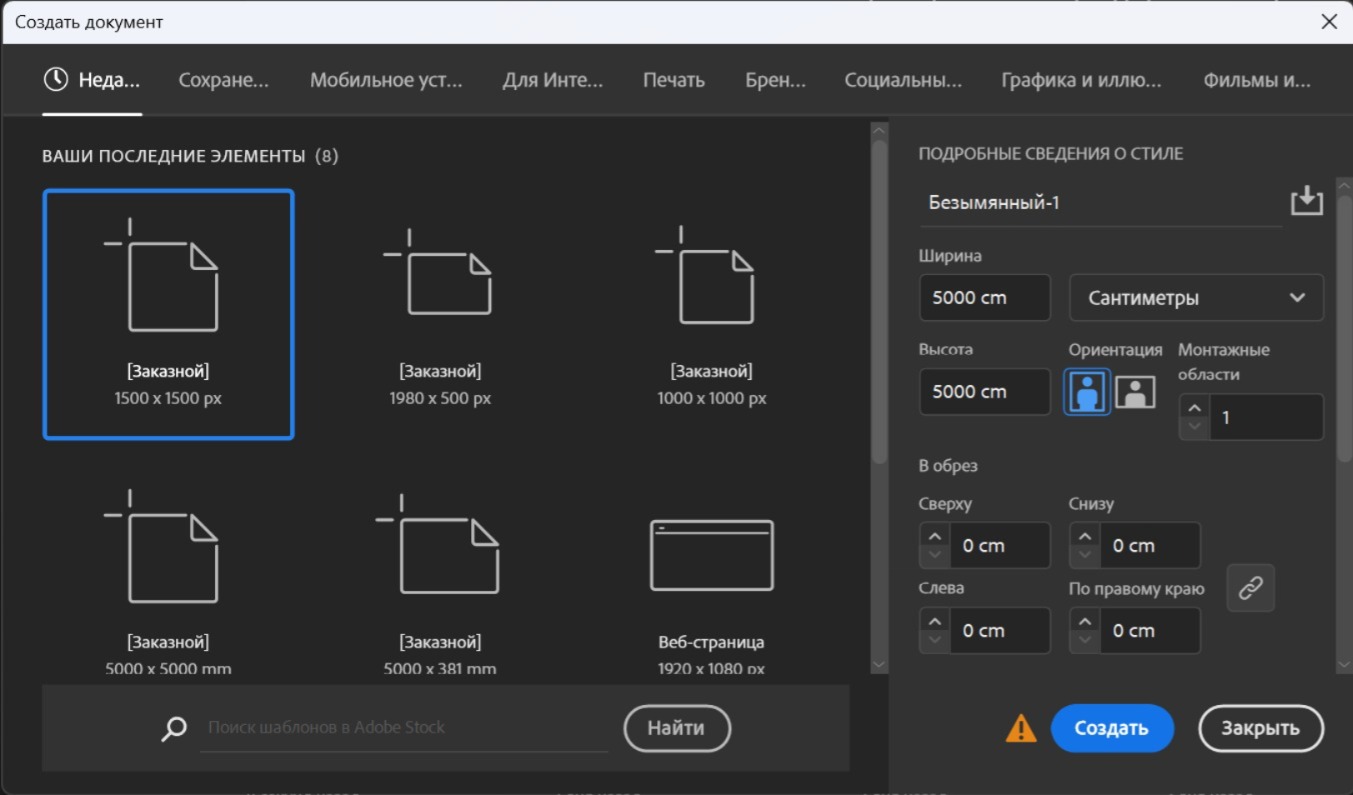
Image «D-1.1»
File name
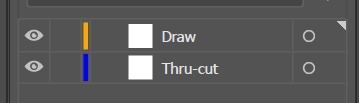
Now let’s move on to creation. On the right side of the screen, in the “Layers” tab, click the plus icon to create new layers. Double-click the first layer and name it «Draw». Then adjust the color by clicking the colored square on the right. Set the following values:
Hue: 27; Saturation: 240; Brightness: 120;
Red: 254; Green: 169; Blue: 0.
Save the values and move on to the second layer. Do the same steps, but name the layer «Thru-Cut», and use these color settings:
Hue: 160; Saturation: 240; Brightness: 120;
Red: 0; Green: 0; Blue: 254.
The file name is based on the project’s title page. Let’s look at an example of such a page in the image «D-1.2». We’re only interested in the fields marked in red “areas.”
1 – Customer company name
2 – Project name
3 – Mattress material
Now let’s set the file name and look at an example (image “D-1.3”):

Image «D-1.3»
The first three are the points mentioned above.
What about the rest?
4 – The name of the SIB Duratras location, from which the digital drawings will be created.
5 – The shortened project name, which we come up with ourselves and will continue to use later.
6 – A situational note. If the drawings don’t fit on a single artboard, a second file will be created, and instead of “Part 1, 2, 3…” the note “DEEL 1, 2, 3…” is used.
7 – The file extension for drawings. By default, Adobe Illustrator saves files in its own format — .ai, and that’s exactly the one we need.

Image «D-1.2»

Image «D-1.4»
Enter the file name and save it.
Note that in the image «D-1.4» we didn’t include the part and number, but such a note may be required in real work — keep that in mind.
* – in item number 3 on image «D-1.2», in addition to the already entered «Sil-Pan», there is also something called «gal». Roughly speaking, this indicates which hooks should be used in this project. This information isn’t needed for the drawings, so we don’t include it.
Layouts

Now let’s move on to creation. On the right side of the screen, in the “Layers” tab, click the plus icon to create new layers. Double-click the first layer and name it «Draw». Then adjust the color by clicking the colored square on the right. Set the following values:
Hue: 27; Saturation: 240; Brightness: 120;
Red: 254; Green: 169; Blue: 0.
Save the values and move on to the second layer. Do the same steps, but name the layer «Thru-Cut», and use these color settings:
Hue: 160; Saturation: 240; Brightness: 120;
Red: 0; Green: 0; Blue: 254.

Now let’s move on to creation. On the right side of the screen, in the “Layers” tab, click the plus icon to create new layers. Double-click the first layer and name it Draw. Then adjust the color by clicking the colored square on the right. Set the following values:
Hue: 27; Saturation: 240; Brightness: 120;
Red: 254; Green: 169; Blue: 0.
Save the values and move on to the second layer. Do the same steps, but name the layer Thru-Cut, and use these color settings:
Hue: 160; Saturation: 240; Brightness: 120;
Red: 0; Green: 0; Blue: 254.
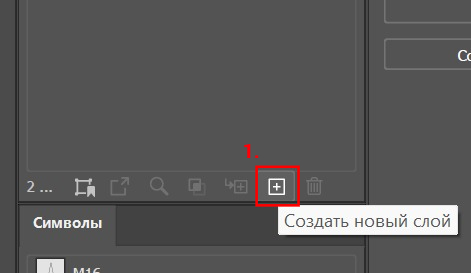
Image «D-1.5»

Image «D-1.6»
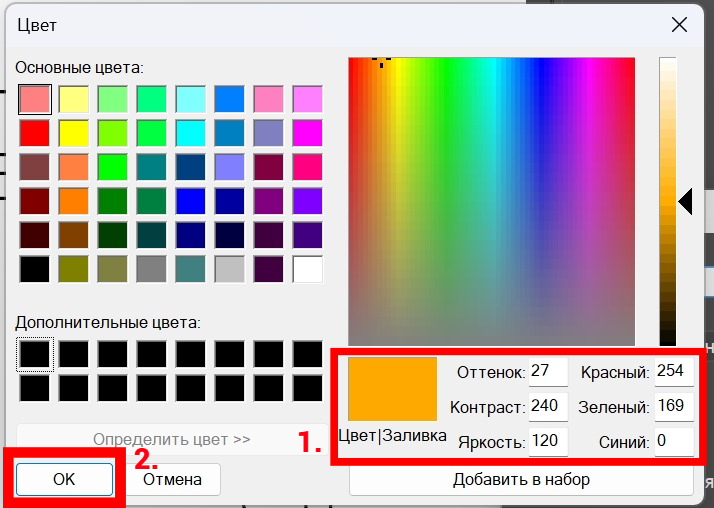
Image «D-1.7»