Drawing Basics
or how to transfer measurements into digital form
In addition to learning how to create drawings, we’ll also dive into how to read measurement drawings and transfer them onto our canvas in Adobe Illustrator.
In this chapter, we’ll cover only the basics of creating simple rectangles, ellipses, and their outlines — skills that will undoubtedly come in handy later on.
Creating a simple drawing
Follow the images.
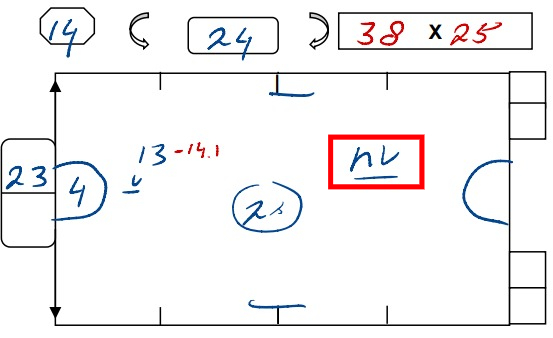
Image «D-2.1» — what information do we take from here?
1 – Mattress width and height.
Measurements are written in the format:
width × height (150 × 40 — see image «D-2.1»)
2 – Mattress number, which will be written directly on the mattress.
3 – Type of filling. It’s not always specified, but if something like this appears on the measurement drawing, we write it on the mattress tag.
We’ll look at some of the filling labels below.

Image «D-2.1»
Create a rectangle by pressing the hotkey “M” and entering the width and height specified in the measurements.
Since this is our main layer, not the outline, make sure the rectangle is placed in the «Draw» layer.
Don’t forget to remove the fill from the object and add a 6 pt stroke.
In image «D-2.3», the rectangle has an orange outline — this is done solely to demonstrate the object’s layer.
Image «D-2.3»

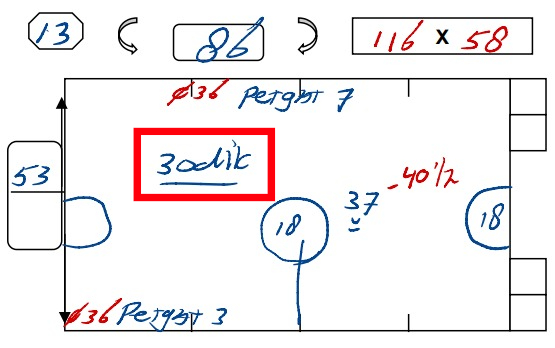
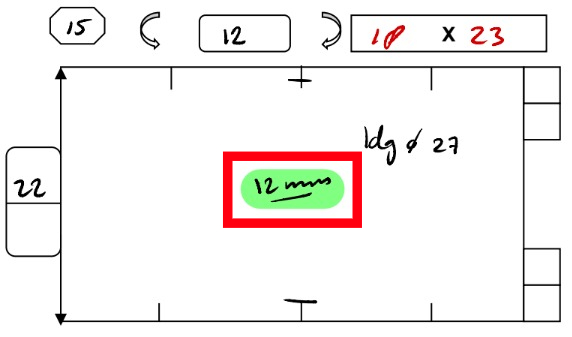
Image «D-2.2»
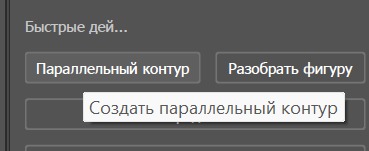
Image «D-2.4»
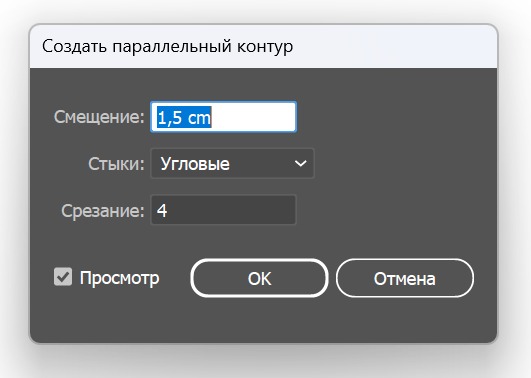
Image «D-2.5»
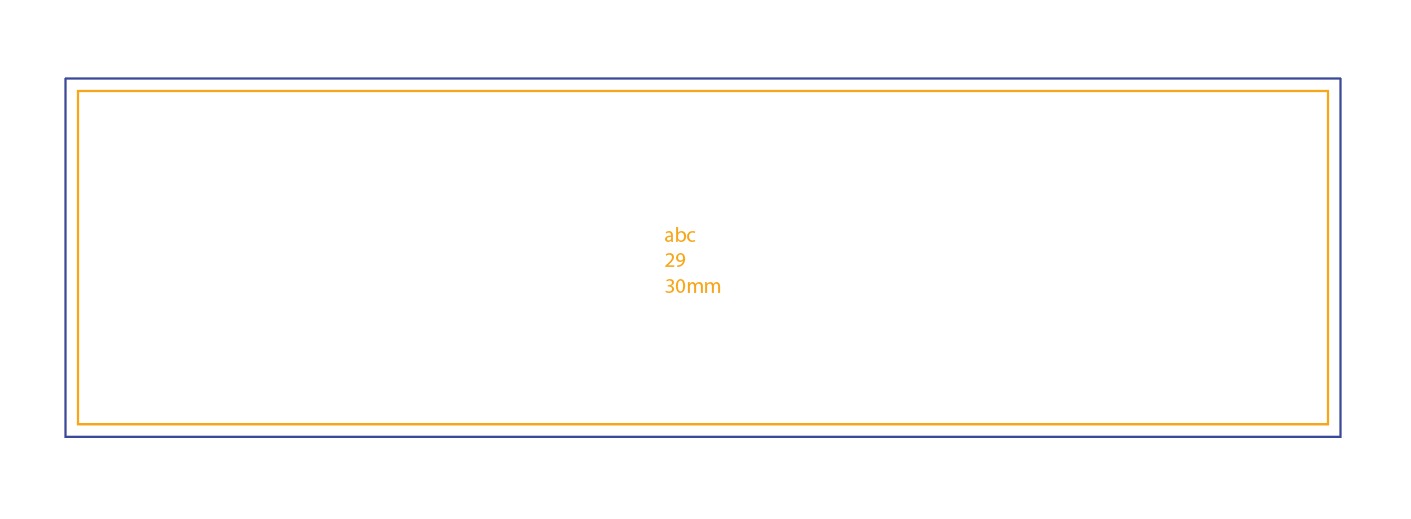
Image «D-2.6»
Select the rectangle and create a parallel outline for it.
Set the offset based on the material specified on the title page:
If one of the materials is HT or HTM, set the offset to 2 cm; if such material is not used in the project, the offset should be 1.5 cm.
Note that in image «D-2.6» the outline is blue. This is an important detail because all objects (texts, DDs, splits, and so on) will be located in the «Draw» layer, except for parallel outlines. All parallel outlines will be placed in the «Thru-cut» layer.
Filling labels
Earlier, we already mentioned the label for filling thickness. Now we’ll take a look at the most common types of filling and how they are labeled.
- 50mm – the “default” filling. Usually, this thickness is not labeled either in the measurements or on our drawings.
- 30mm – may be written as “30dik” or “dun wol.”
- 25mm – most often appears as “nv.”
- 12mm – rarely used and usually labeled simply as “12mm.”
Filling «nv»
Filling «30dik»
Filling «12mm»
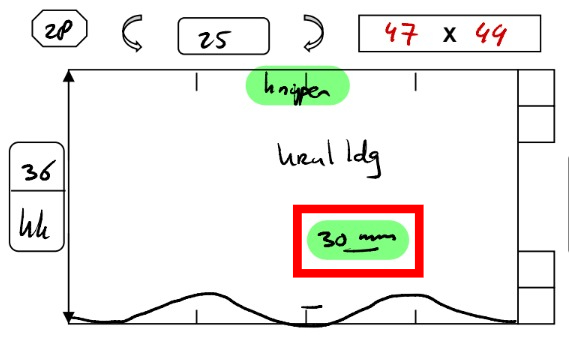
Filling «30mm»
There’s also a type of filling called “DD” / “dd,” but it’s not enough to simply label it, as it’s often an insert size. We’ll take a closer look at this size in another topic.
Symbols on measurement drawings
Different symbols may appear on measurement drawings, and understanding them is essential for creating an accurate drawing.
Let’s take a look at two commonly used symbols:
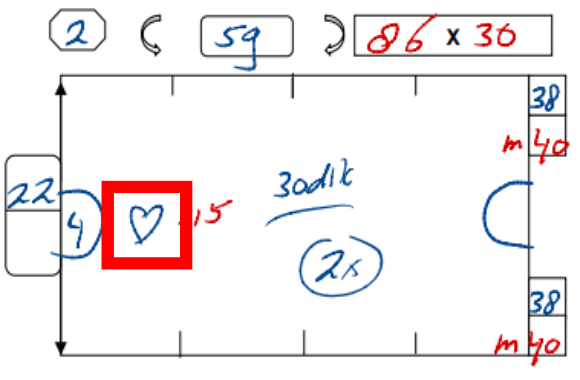
♡ – Center
A simple indication that a particular object, cutout, or other element is centered. Usually, “center” refers to the Y-axis, but of course, there may be measurement drawings where this symbol marks the center along the X-axis instead.

⋀ – Direction
In fact, this arrow can point in any of the four directions. In the specific image mentioned above, it indicates that a margin should be made from the bottom edge of the drawing. In other words, the offset is taken from the point where the arrow originates.
♡ – Center
A simple indication that a particular object, cutout, or other element is centered. Usually, “center” refers to the Y-axis, but of course, there may be measurement drawings where this symbol marks the center along the X-axis instead.
⋀ – Direction
In fact, this arrow can point in any of the four directions. In the specific image mentioned above, it indicates that a margin should be made from the bottom edge of the drawing. In other words, the offset is taken from the point where the arrow originates.


