Scripts & Hotkeys
Why are they useful? Installation
Hotkeys and where to find them
We’ll be talking about the built-in hotkeys in Adobe Illustrator, how to modify and customize them, as well as how to add new ones.
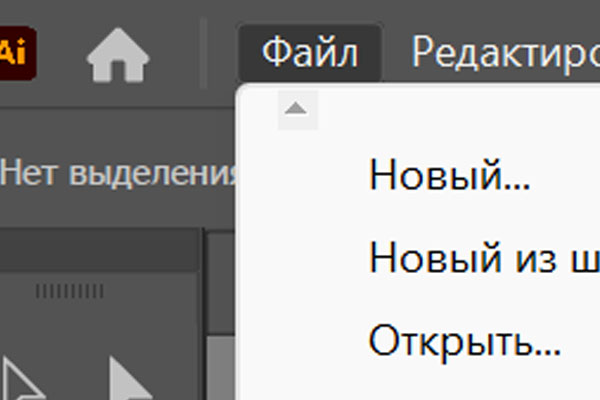
To open the keyboard shortcuts menu, press Alt+Shift+Ctrl+K in the active Adobe Illustrator window.
Here, create a settings profile and adjust everything as you prefer.
We recommend assigning a hotkey to the “Measure” tool, which acts as a kind of ruler.

Image «D-3.1»
Operations
We’ve covered the hotkeys for tools.
Now let’s move on to operation hotkeys, which will significantly speed up your workflow and take a big step toward automation.
Go to the “Window” tab, scroll down, and find “Actions,” then open it.
Click the “plus” icon at the bottom of the panel to create a new action.
Choose the color, name, and hotkey as you prefer.
After creating the action, recording will start automatically. Stop it by clicking the “square” icon at the bottom of the Actions window if your materials for recording aren’t ready yet.
Create the objects you need — in our case, the mattress and the darts.
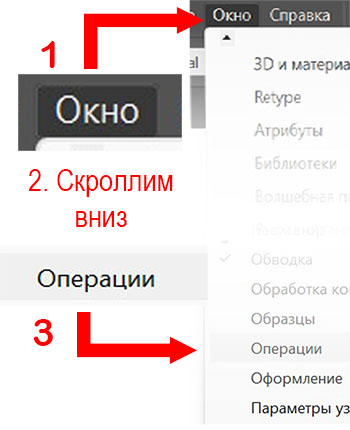
Image «D-3.2»
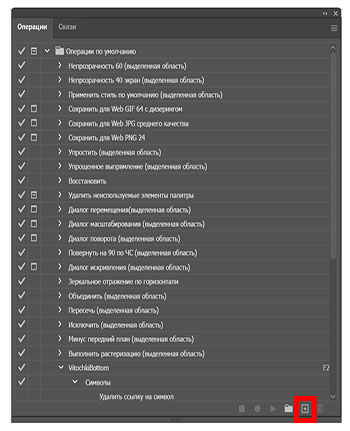
Image «D-3.3»
Image «D-3.4»
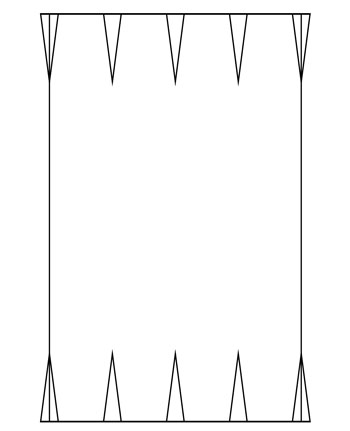
Image «D-3.5»
Start recording by clicking the “circle” icon at the bottom of the Actions window.
Select the objects and cut them.
Stop the recording and notice that your action now has a new step added to it.
Now, when you press the previously assigned key (or key combination), your action will be executed automatically — saving you time and speeding up the drawing creation process.
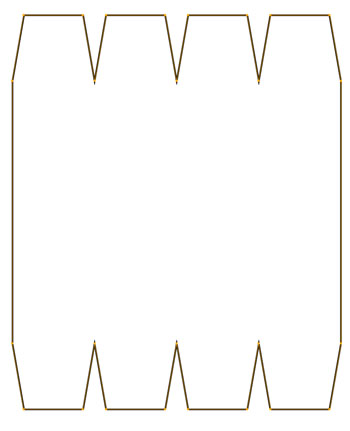
Image «D-3.7»
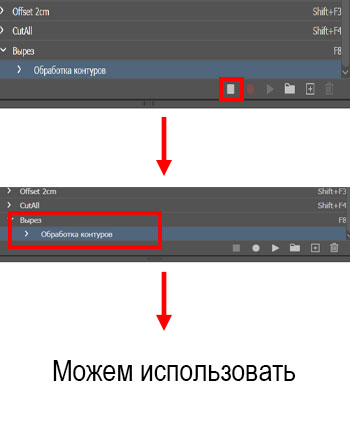
Image «D-3.8»

Image «D-3.6»
In this way, you can create an action for almost any operation (or even a chain of operations) that doesn’t have its own hotkey.
You can create actions for adding a 1.5 cm or 2 cm outline, cutting the top or bottom horizontal edge, moving objects to another layer, and more.
We’ve prepared an archive with ready-made actions for you. You can learn how to install them and see what actions are included by clicking the button below this text.
Installing scripts
Scripts
While actions allow us to replace several steps with one, scripts add an additional menu that lets you quickly create PET objects and mattress bases with darts — elements that could otherwise take several minutes to make without this panel.
Usage guide
Mattress creation menu
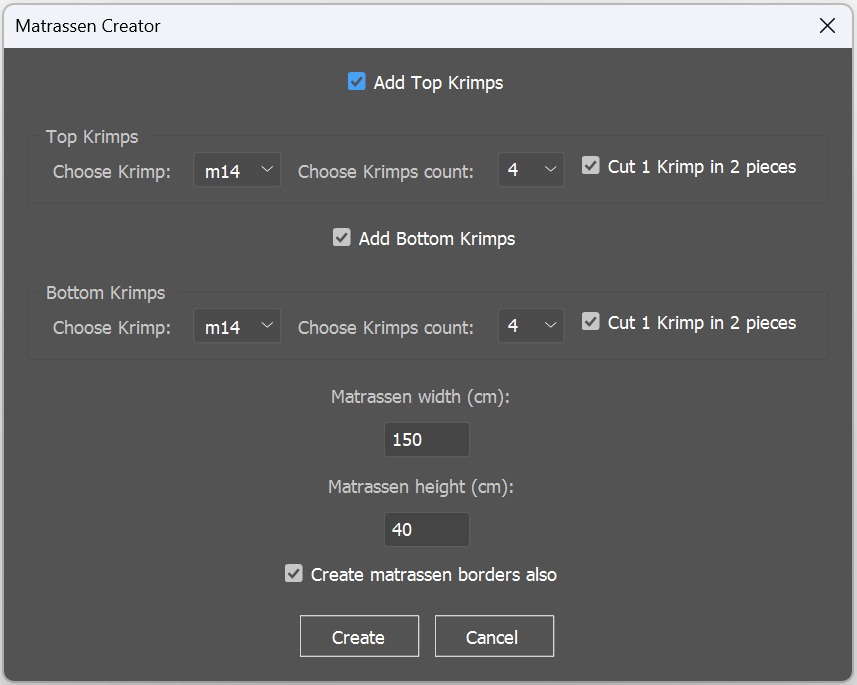
Image «D-3.9»

Let’s go step by step, looking at image «D-3.9».
First, we see the options responsible for the top and bottom darts.
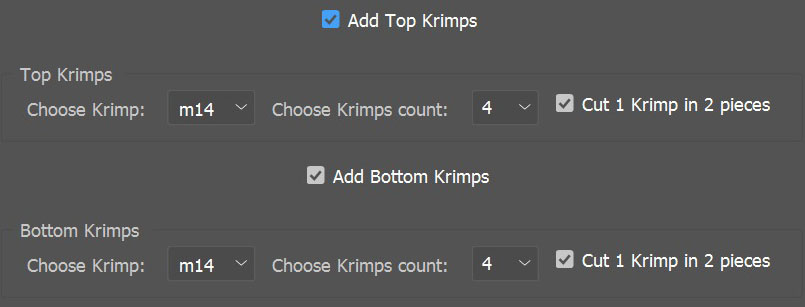
First, we see the “checkboxes” that indicate whether darts are present — with separate options for top and bottom darts (if, for example, the checkbox for top darts isn’t checked, they won’t appear in the final result).
Dart type > quantity, and a checkbox that controls splitting one dart into two parts and placing them on the sides.
We’ve covered this type of split in more detail in the topic about krimps.

Next comes the mattress creation panel — width, height, and the «checkbox» that controls the creation of the mattress base itself.
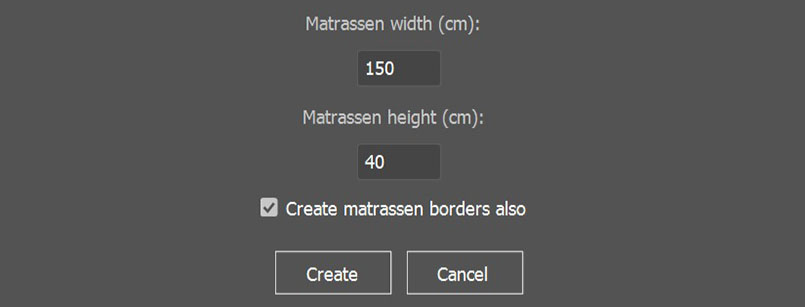
If it’s disabled, the darts will simply be placed according to the specified width and height (if both horizontal pairs are created).
The “Create” and “Cancel” buttons are responsible for generating and closing the script creation window, respectively.

PET creation menu
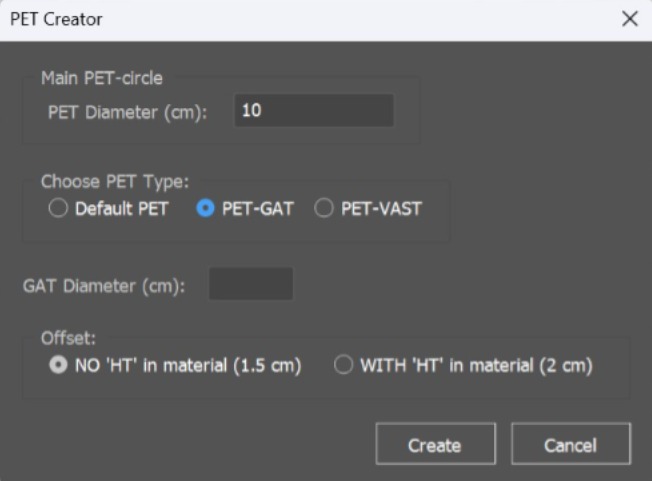
Image «D-3.10»
Refer to image «D-3.10».
PET diameter (in cm) and the PET type itself.
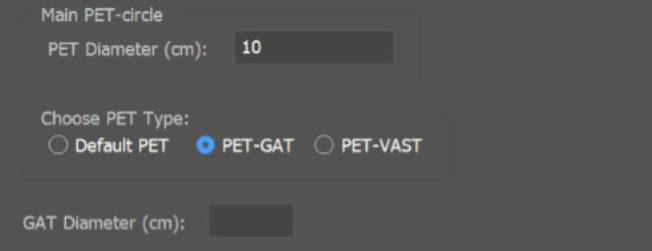
After selecting the “PET Gat” type, an additional panel will appear where you can specify the Gat size.
Choose the outline size and create it.
Installing scripts
The installation guide and the link to the script archive are available via the button below this text.